If you are a student working on academic papers, research projects, or reference lists, you have likely encountered the term "hanging indent." A hanging indent is a formatting style where the first line of a paragraph aligns with the left margin while the second and subsequent lines are indented. This formatting style is commonly used for citation styles like APA, MLA, and other academic formats to organize works cited pages, bibliographies, and reference lists.
This detailed guide will explain why a hanging indent is essential and provide step-by-step instructions on creating one in Microsoft Word and Google Docs. Whether using a Mac or a PC, this guide will walk you through the process clearly and precisely.
What is a Hanging Indent?
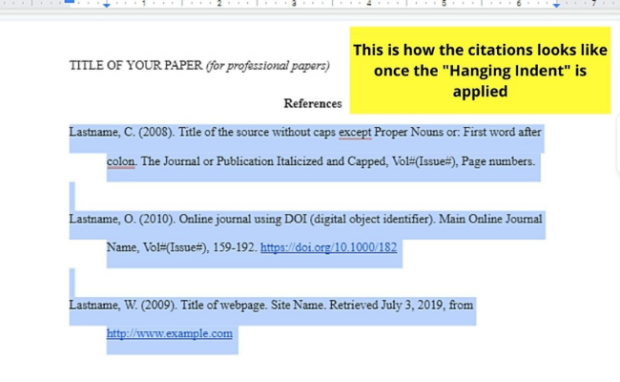
A hanging indent is a special indentation feature used in formatting documents. In this style, the first line of a paragraph starts at the left margin, while the second and subsequent lines are indented by a specific amount, usually 0.5 inches. This formatting style is useful for organizing multiple citation entries, reference lists, and bibliographies.
For example, if you create a works cited page in MLA format or a reference list in APA format, you must use a hanging indent to ensure your citations are properly aligned. This formatting style makes your document look professional and helps readers easily navigate your references.
How to Do a Hanging Indent
Creating a hanging indent may seem challenging initially, but it is straightforward once you understand the steps. Below, we will provide detailed instructions on creating a hanging indent in Microsoft Word and Google Docs.
How to Do a Hanging Indent on Word
Microsoft Word is one of the most widely used word-processing tools, and it offers several methods to create a hanging indent. Here is a step-by-step guide:
Method 1: Using the Paragraph Dialog Box

Open Your Document: Launch Microsoft Word and open the document where you want to create a hanging indent.
Highlight the Text: Select the paragraph or paragraphs where you want to apply the hanging indent. If you are formatting multiple citation entries, highlight all the lines.
Access the Paragraph Settings: Go to the Home Tab on the top menu. In the Paragraph group, click the small arrow in the bottom-right corner to open the Paragraph Dialog Box.
Choose Hanging Indent: In the Paragraph Dialog Box, look for the Indentation Section. Under the Special drop-down menu, select Hanging. By default, the indentation is set to 0.5 inches, the standard for most citation styles.
Click Apply: Once you have selected the hanging indent option, click OK or Apply to format your text.
Method 2: Using the Ruler
Enable the Ruler: If the ruler is not visible, go to the View Tab and check the Ruler option.
Adjust the Indent Markers: The ruler has two triangular markers. Drag the bottom marker (the upward-pointing triangle) to the right to create the hanging indent. The first line will remain aligned with the left margin, while the second and subsequent lines will be indented.
Method 3: Using Keyboard Shortcuts
Highlight the Text: Select the text you want to format.
Press Ctrl + T: This keyboard shortcut automatically creates a hanging indent for the selected text.
How to Do a Hanging Indent on Google Docs
Google Docs is a popular alternative to Microsoft Word, especially for students who prefer cloud-based tools. Here is how you can create a hanging indent in Google Docs:
Method 1: Using the Ruler
Open Your Document: Log in to your Google account and open the document in Google Docs.
Enable the Ruler: If the ruler is not visible, go to the View Tab on the top menu and select Show Ruler.
Highlight the Text: Select the paragraph or paragraphs where you want to apply the hanging indent.
Adjust the Indent Markers: On the ruler, you will see two markers: a blue rectangle and a blue triangle. Drag the left indent marker (the rectangle) to the right to set the indentation for the second and subsequent lines. The first line will remain aligned with the left margin.
Method 2: Using the Format Menu
Highlight the Text: Select the text you want to format.
Access the Format Menu: Go to the Format Tab on the top menu and select Align & Indent.
Choose Indentation Options: Click on Indentation Options and then select Special Indent. From the drop-down menu, choose Hanging.
Set the Indentation: By default, the indentation is set to 0.5 inches. You can adjust this value if needed.
Click Apply: Once you have set the indentation, click Apply to format your text.
Why Use a Hanging Indent?
Hanging indents are essential for creating well-organized and professional-looking documents. Here are some reasons why you should use this formatting style:
Compliance with Citation Styles: Most academic citation styles, including APA, MLA, and Chicago, require hanging indents for reference lists and bibliographies.
Improved Readability: Hanging indents make it easier for readers to distinguish between different entries in a list.
Professional Appearance: Using hanging indents gives your document a polished and professional look, which is especially important for academic and research papers.
Tips for Using Hanging Indents
Check Your Citation Style Guidelines: Different citation styles have specific requirements for indentation. Make sure to follow the guidelines for your chosen style.
Use the Paragraph Dialog Box: The Paragraph Dialog Box in Microsoft Word and the Format Menu in Google Docs provide precise control over indentation settings.
Test Your Formatting: Before finalizing your document, review your hanging indents to ensure they are consistent and correctly applied.
Get Custom Hanging Indent Help from our Professionals
Navigating the challenges of hanging indents and proper citation formatting can be challenging, especially when dealing with complex academic papers. If you struggle to create hanging indents in Google Docs or Microsoft Word or need assistance with ensuring all your citations are correctly formatted according to specific citation styles like APA or MLA, Acemyhomework.com is here to help.
We offer custom hanging indent assistance, expert guidance, and tailored formatting services. Whether you require help with a single paragraph or an entire works cited page, we can ensure that your document adheres to the required formatting standards.
Beyond formatting, we also offer comprehensive writing services for all academic papers. This means you can receive assistance from research and drafting to final formatting and proofreading. Our team is well-versed in creating properly formatted references and bibliographies, ensuring that every entry, from the first to the subsequent lines, is perfectly aligned.
Benefits of Seeking Our Formatting Assistance:
Accuracy and Consistency: We ensure that your hanging indents and all other formatting elements are accurate and consistent throughout your document, eliminating the risk of errors and inconsistencies. We pay close attention to paragraph settings and indentation options.
Time Savings: Formatting can be time-consuming, especially when dealing with multiple citation entries. By seeking our assistance, you can save valuable time and focus on other aspects of your academic work.
Adherence to Citation Styles: We know various citation styles, including APA and MLA. We ensure that your document adheres to the specific requirements of your chosen formatting style, including proper line spacing and indentation.
Professional Presentation: Proper formatting enhances the professional presentation of your academic papers. Our assistance ensures that your document looks polished and professional.
Reduced Stress: Formatting errors can cause stress and anxiety. By seeking our assistance, you can alleviate this stress and have peace of mind knowing that your document is formatted correctly.
Improved Grades: Correct formatting is often a component of your grade. Ensuring your document is formatted correctly can improve your chances of receiving a higher grade.
Expert Guidance: We provide expert guidance on all formatting aspects, including how to create hanging indents in Google Docs and Microsoft Word. We can help you understand the nuances of paragraph dialog boxes and indentation options.
Avoid common mistakes: We can help you avoid common mistakes, such as using the space bar or hitting enter to create indents and ensure that your line breaks are correct.
All your citations are perfect: We will check and ensure all your citations are correctly formatted.
Our team is ready to assist if you need help with a single hanging indent or a complete academic paper. Let us help you achieve academic success with our expert writing and formatting services.
Frequently Asked Questions
How do I ensure all my citations are formatted correctly, especially when pasting them into my document?
Pay close attention to the paragraph settings to ensure all your citations are formatted correctly, particularly after you paste them into your document. Instead of relying on the space bar or hitting enter for line breaks, use the paragraph dialog box to apply a hanging indent. This will automatically format your citations, ensuring the second and subsequent lines are indented. If you are using Google Docs, you can find these paragraph options under the "Format" menu, then "Align & indent," and finally, "Indentation options." This method avoids inconsistencies that can arise from manual spacing.
What is the difference between line indent and line spacing, and why does it matter?
Line indent refers to the horizontal positioning of lines within a paragraph, such as a hanging indent where the second line indent is applied. On the other hand, line spacing refers to the vertical distance between lines of text. These are distinct formatting elements. It matters because proper line indent ensures your reference lists are visually organized and adhere to citation style guidelines. In contrast, line spacing affects the overall readability of your document. Understanding the difference prevents confusion and ensures professional document formatting.
Can I automatically format a pasted list of citations with a hanging indent?
Yes, you can automatically format a pasted list of citations with a hanging indent. After you paste the list, highlight all your citations and access the paragraph settings. In Microsoft Word, this is done through the paragraph dialog box; in Google Docs, it is done through the "Indentation options." Select the "Hanging" option from the special indent drop-down menu, and the software will automatically format the selected citations. This method eliminates manual adjustments, saves time, and ensures consistency.
How do I move my cursor to the next line without creating a new paragraph or messing up my line breaks?
Use a soft return to move your cursor to the next line without creating a new paragraph or messing up your line breaks. This is achieved by pressing Shift + Enter. This command inserts a line break within the same paragraph, moving the cursor to the second line without creating a new paragraph. This is particularly useful when controlling line breaks within a hanging indent or other specific paragraph formatting.
When should I take note of paragraph options and second line indent when creating a bibliography?
When creating a bibliography, you should note paragraph options and second-line indent to ensure your reference list adheres to the required formatting style. This is especially important when using citation styles like APA or MLA, which mandate hanging indents. Pay close attention to the paragraph options to adjust the second-line indent accurately. Checking these settings before finalizing your bibliography will ensure that all your citations are consistently formatted, enhancing the professionalism of your document.